Wednesday, July 18, 2012

Carb Completed

The weather in Phoenix, Arizona this time of year is not conducive to my restoration project as it's VERY hot in the garage and the humidity is too high for my evaporative cooler to be effective.  I was motivated to get some work done so I moved inside for the carb rebuild.

One piece of disassembly I hadn't done was removal of the jet block. I wasn't sure how it was connected but a bit of searching led me to believe that it is simply pressed in. It is, in fact, a press-in assembly and a few light taps with a dead-blow hammer using a deep-well socket as a "punch" knocked it right out with no damange.  here is a small screw in the carb body that keeps the jet block from rotating  that must be removed. The block had a fair amount of oxication holdin it in place but it cleaned right up. My rebuild kit included the paper washer which fits below the jet-block.


I did all the cleaning outside in the morning while it was relatively cool.  I'd done some rubbing with scotch-brite pads to get the worst of the grime and oxidation off of the main carb body and used carb cleaner on everything else.  I read somewhere that a dip in a 3:1 mix of water:muratic acid would brighten up the aluminum so I figured I'd give that a try too.  This treatment helped remove most of the oxidation, especially in the hard to reach corners and crannies.  It probably would have done more if I had let the parts soak longer.  I only put the parts in the mix for a couple of minutes before reinsing them and neutralizing the acid.  A quick spray with silicone lube once dry gave everything a nice luster and should help protect the parts from oxidation.

My rebuild kit included all the gaskets and I also ordered a new float needle.  Everything went back together without any issues.  The slide and barrel look good and slide well without slop. I shouldldn't have to open her up again unless I have to re-jet one of the circuits after I get her running.  I put the needle back in the same groove I found it - assuming it ran that way some time her distant past.  I won't know if that was right until she runs.

I need to find a new o-ring to fit between the carb and engine, an air intake tube, and some type of filter and I'll be ready to mix air and fuel.

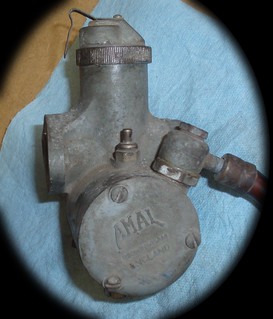
Here is a picture after the clean and rebuild.  The carb is an Amal 376.
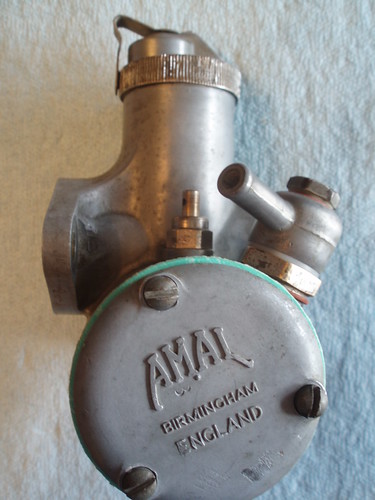
After Cleaning

Thursday, May 10, 2012

Starting On The Carburetor


While I wait for parts to arrive in the mail to finish up engine assembly I decided to get started on the carburetor rebuild.  The carb. on the Triumph is an Amal 376.  I ordered a complete rebuild kit.  All the o-rings, washers, gaskets, and a new float valve.  All of the jets looked shockingly clean so I didn't order new ones.  I may regret that later but they're not hard to get and I'm not under any real time pressure.

I took a LOT of pictures.  Even though I have a parts manual and a service manual for the bike I've found having pictures when you start reassembly to be worth the few minutes it takes to capture them.  It also gives me good visuals for my blog posts, which would be boring without without them.

To that end.  Here is a before shot of the carburetor to compare with an after shot which I'll take once I'm done.  So far I've only got the tear-down complete and some of the parts washed.  I'll start polishing up the body next.  Not looking for a really shiny finished product but, as you can see from the picture, it's pretty oxidized and dirty right now.
Amal 376 - Before
Amal 376 - Before

Headless No More


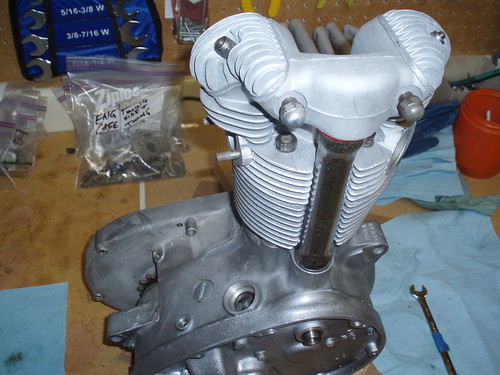
I'm one step closer to a complete engine.  I've just ordered a few miscellaneous parts that will allow me to button it up but here's the latest shot of my progress.  After some fiddling and improvising a tool to align the pushrods to the rocker arms I got the head bolted on... twice.

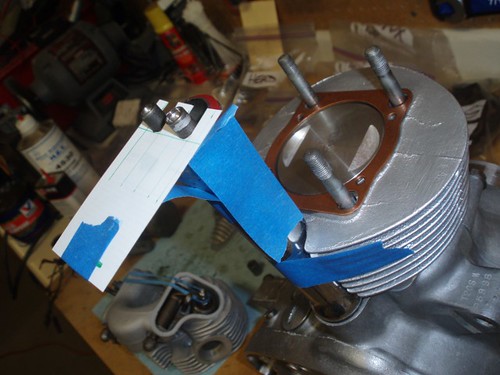
After some struggling I found a 'tool' that holds the pushrods in place while fitting the head down onto the bolts.  The tool, along with a rubber band between the two rocker arms to hold them against the top of the rods, once aligned, made the job MUCH easier.  Even with that the rods switched places on me the first time I got the head on.  The exhaust valve was opening on the down-stroke of the piston, instead of on the exhaust stroke - DRAT!  I had to remove the head, reposition the rods, and start the frustrating procedure of lowering the head back onto the bolts while aligning the rocker arms with the rods.  It went together a bit more smoothly the second time but not without some problems.

Attempt number two and the rods were opening and closing the valves at the proper times.  I then set the valve clearances and put the rocker arm covers in place.  Once I get the timing pieces and a few other bits I'll finish up the assembly of the engine and get ready to put it into the frame.  I've got to get the carb rebuilt first.  I'd like to do as much work on the bench before putting the engine into the frame.  I don't have a stand on which I can put the entire bike so once the engine is in the frame things become more uncomfortable to work on.  I may look into building some sort of stand for the final assembly.

Here are a few pictures of the engine.  One of it nearly complete, the second is a shot of the pushrods being held by my fancy 'tool', awaiting fitment of the head.

Engine nearly completed PushRods

Tuesday, April 17, 2012

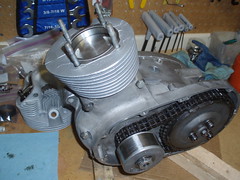
Piston And Barrel Mounted


P4170004
Originally uploaded by Gym_x
Today was the third day in a row I've worked on my Triumph Cub restoration. I installed the new piston and mounted the re-bored and painted barrel. I had the barrel and head machined a while back and the parts have been waiting for me to get moving again.  Well, movement is happening and I hope to keep the momentum going.

I'm ready to put the head on next and hope to get to that tomorrow. I started fitting pieces tonight but didn't have the patience to install the push rods in the tube and get them mated up to the rockers.  It seemed like it was going to be quite the chore; one to be saved for an evening when I can take my time.

Monday, April 16, 2012

Two In A Row!

ClutchSide
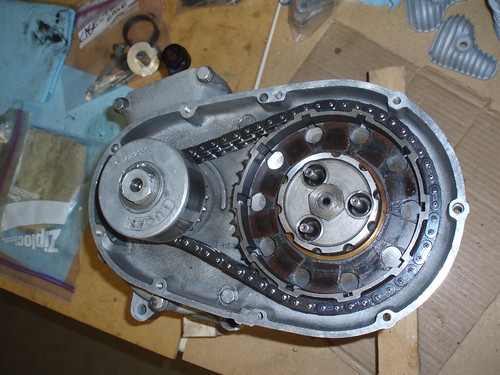
Two posts in two days! Can you believe it?! With the progress I made yesterday I decided to keep the momentum going by doing a little work tonight after dinner. I finished up the gear case side of the engine, stopping short of sealing it up until I'm closer to 'done'. Then flipped it over and fitted the clutch basket, drive gear, primary chain and rotor. I didn't think this would take much time but, like everything else with this project, it did. Party because I'm careful to check everything two and three times to be sure it's right before proceeding. I can't claim to be in any hurry now and if being methodical saves me a tear-down and rebuild because I missed something I'm better off anyway.

I'm not making predictions but I don't have anything planned for tomorrow evening so I may go 3 for 3!

Only one picture tonight. Nothing very interesting really. I'm getting to the timing and ignition which should be more interesting. What would we do without Ziploc Bags? I forgot how much my hands hurt after doing this type of work.

Sunday, April 15, 2012

Engine Work Gets Going... Finally


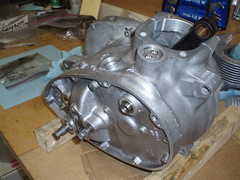
Engine 1
Originally uploaded by Gym_x
I finally got the engine work started again on my Cub. Working on a friends old BMW this weekend was the motivation I needed to get moving.  That and the wife being out of town provided the inspiration and opportunity for some serious garage time.

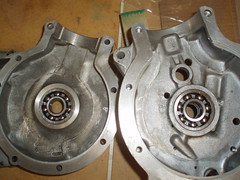
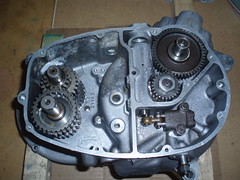
The first photo is the engine as I left it on  the bench after today's work.  I started with the cases just having received their new bearings and seals.  I did that work but by bit over the past few weeks.  Today I installed the crank, rejoined the cases, installed the gearset, oil pump, cam, timing gears, tappets (or cam-followers, or lifters or whatever other term you want to use), and installed the inner cover.  I think that covers it.  No issues really, other than the main shaft binding when I tightened up the inner cover.  Had an extra washer on the mainshaft which caused the binding.

There is still a looooong way to go but I'm happy with the progress today.   Here are more pictures from the day.

CrankCases Gears1
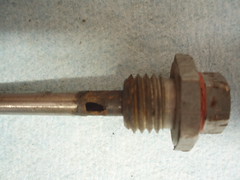
I did have one other problem. The oil level tube on the drain plug had a bit of a hole. Have to get a new one on the way before I fill her up with oil.
OilPlug

Wednesday, May 18, 2011

Head and Barrel

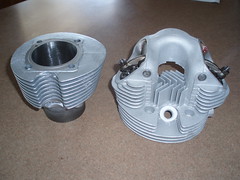
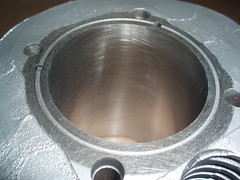
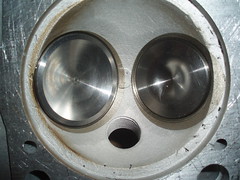
In order to get things moving forward again I sent some parts off to a machinist who specializes in restorations and has experience with old Triumphs, some of them Cubs.  I packed up the head, barrel and old piston and sent them off to Baxter Cycle in Marne, Iowa.  About 5 days after dropping the box off at the post office I got a call from their machinst.  After a brief chat about my options and extimated costs we had a plan.  The very next day the phone rang and my parts were ready to be shipped back.  In the reassembled head I had: 2 new valves, 2 new valve guides, miscelaneous washers and a cleaned and painted head.  The barrel got a re-bore and a new piston and rings to match.  It was also cleaned up and painted to match the head.

This post can't go without a few pictures.
P4290043P4290044P4290048
As you can see, Baxter Cycle did great work and I was shocked how quickly they got my little job finished up.
I've got to get some parts ordered so I can start reassembly.  There is still the hi-gear bearing to remove from the case and some general cleanup but that can happen while I wait for parts to arrive.  I'd better get ordering.
More pictures again next time.

Wednesday, April 27, 2011

Let's get this thing back on track

Well, it's been quite some time since an update was made here.  Since this is my first restoration project I can't compare my progress to past persona experience.  From reading about other people's restorations it seems as though there are two types, in general.  Those who get a bike, collect everythign they need to restore it, then set about doing the work in, more or less, one continuous stream.  The second type are those who get a bike, do some work, have a delay for whatever reason, get back to it, have another delay, maybe waiting for work or parts, then make more progress.  I have definately fallen into the second type.

Like some others my work is fairly seasonal, although opposite of most.  I can't work in my garage in the summertime because it's too hot.  Mostly I read about people not working the winter because they don't have a heated space in which to work.

NEW GOAL:
I'd REALLY like to be able to ride this bike by the end of this year! The weather is good. I've got some funding for my project, having sold a bike, and I'm making progress again.  Step one.

CURRENT STATUS:
It's pretty much like it was after my last post.  The rolling chassis is still sitting in my garage ready for more part to be bolted onto it.  I sent the barrel and head out to a machinst who rebored the cylinder, provided me with a new piston, fitted new valve guides and valves the reassembled the head with some other new parts and gaskets.  He also blasted and painted the cylinder so it should be ready for reassembly to the lower end.

I sealed my gas tank with a 2-part epoxy last weekend.  That process was fairly simple and as described in the instructions.  Now it's ready for sanding then painting.

NEXT STEPS:
Engine reassembly.  I have to remove the old bearings from the cases and order a hi-gear bearing before reassembly can begin.  Everything is apart and cleaned up so it should just be a matter of fitting everything back together.  I'd like to build an engine stand so I can do the engine work on the bench, instead of in the frame.  That may just be more work than I want to do, however. It's far easier to just put the bike up on the bench, so we'll see.

There you have it, an update at last. Hopefully it won't be months before the next one.  I promise pictures too.